
New Appreciation for Zippered Cases
I was gifted some leatherworking tools for my birthday (thanks Phil!), and thus begins the process of combining everything into bundles of “stuff” that each make sense. All the scissors/cutting tools in one bag, all the stitching/needles in another, all the punches/awls in yet another, yadda yadda.

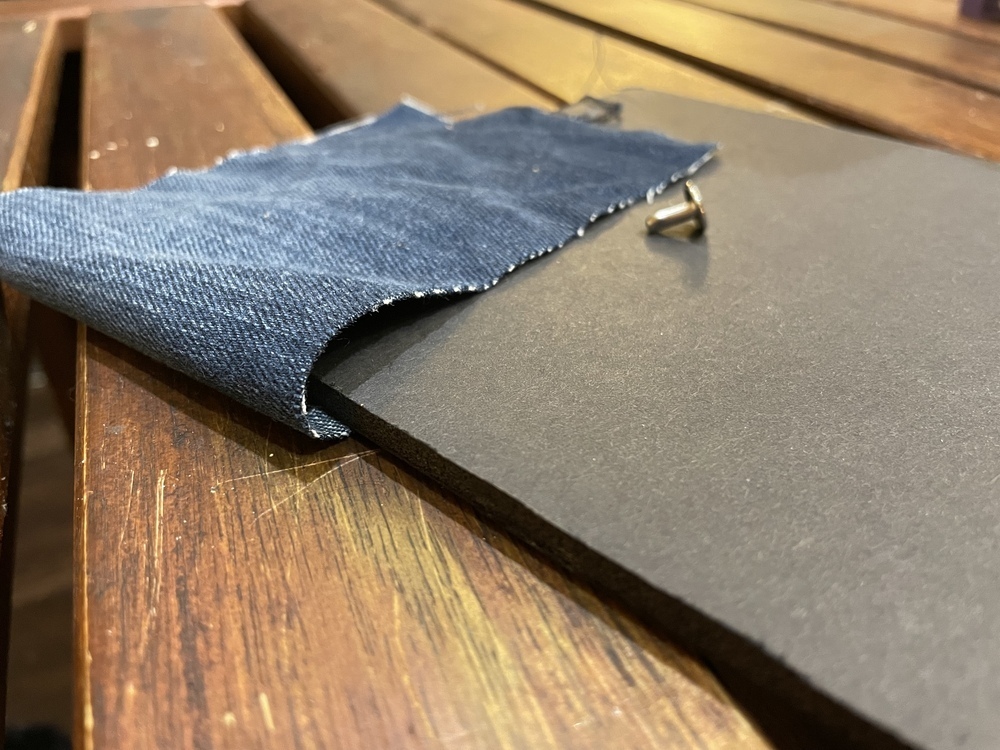
What better way to get practice at using all these tools than to make cases for them? I made the above case “from scratch” using salvaged materials. Some leftover foam-board, denim from a pair of old pants, scavenged zipper from… something. Basically the rivets, washers, and elastic were “new”, but everything else was in various bags/buckets/boxes of scraps.
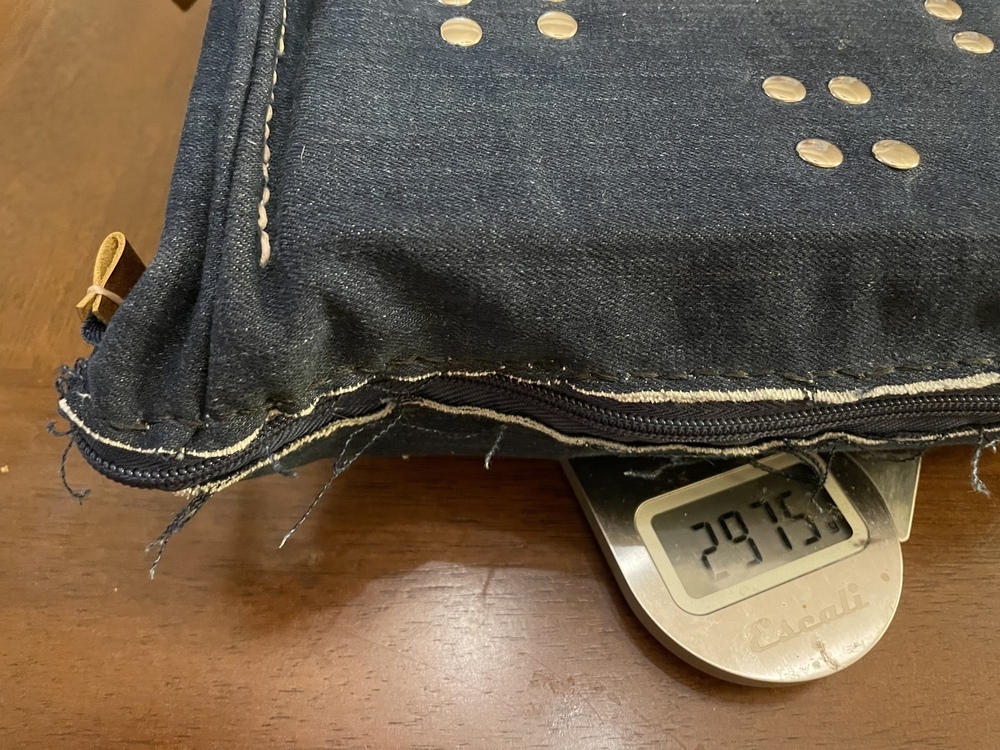
…but what’s in the case? Big, Chonky, Setup/Gauge Blocks! (seriously, this thing weighs ~3kg, ~6.5lbs!)
Why do you need 3kg of chunks of metal? Well… there was this technique that I saw which probably borrows quite a bit from machining (making things out of metal) where you use “known good 90-degree” objects and “very straight bars” to help make your various cuts quicker and more accurate.
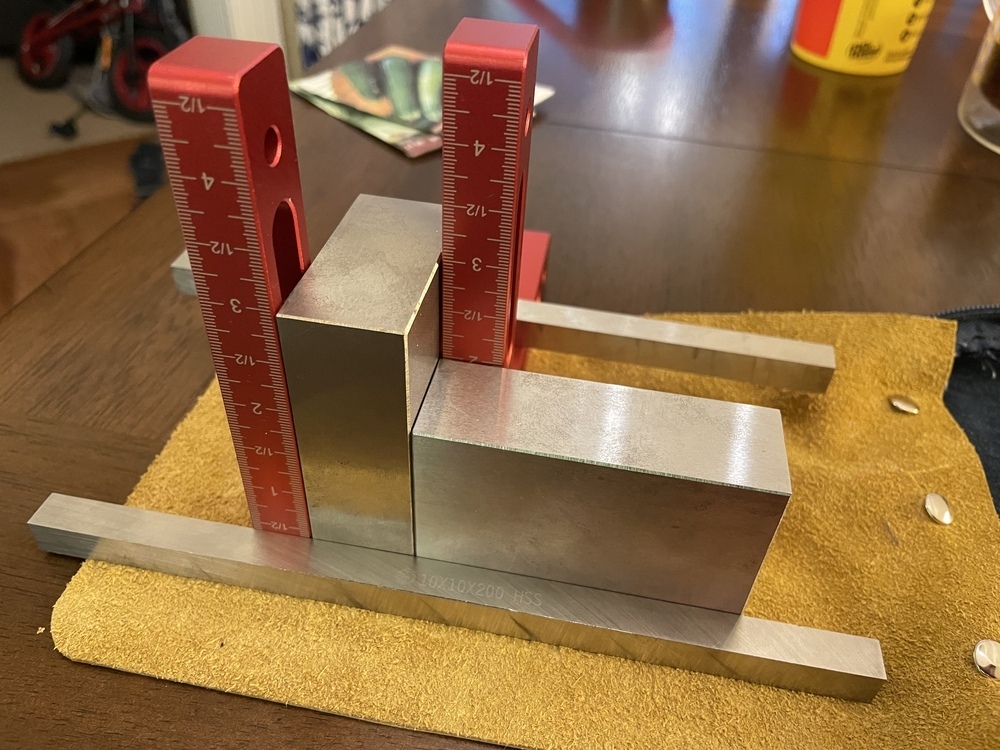
The red ones are basic 90° brackets, and the big chunks of metal are called “3-2-1” blocks, each edge measuring exactly 3, 2 or 1 inches (to within some thousandths of an inch). Overkill on precision for general leatherworking, but because they weigh quite a bit you can use them to help in gluing, holding things in place, or guiding other “very straight” pieces of metal in the right direction.
The long bars are kindof cheating. They’re actually steel blanks for making your own drill bits turning stuff on a lathe, so they’re not truly “precision”, but they were 20cm long and 1cm cross-section and were an order of magnitude cheaper than actual “gauge bars” (especially at the longer lengths).
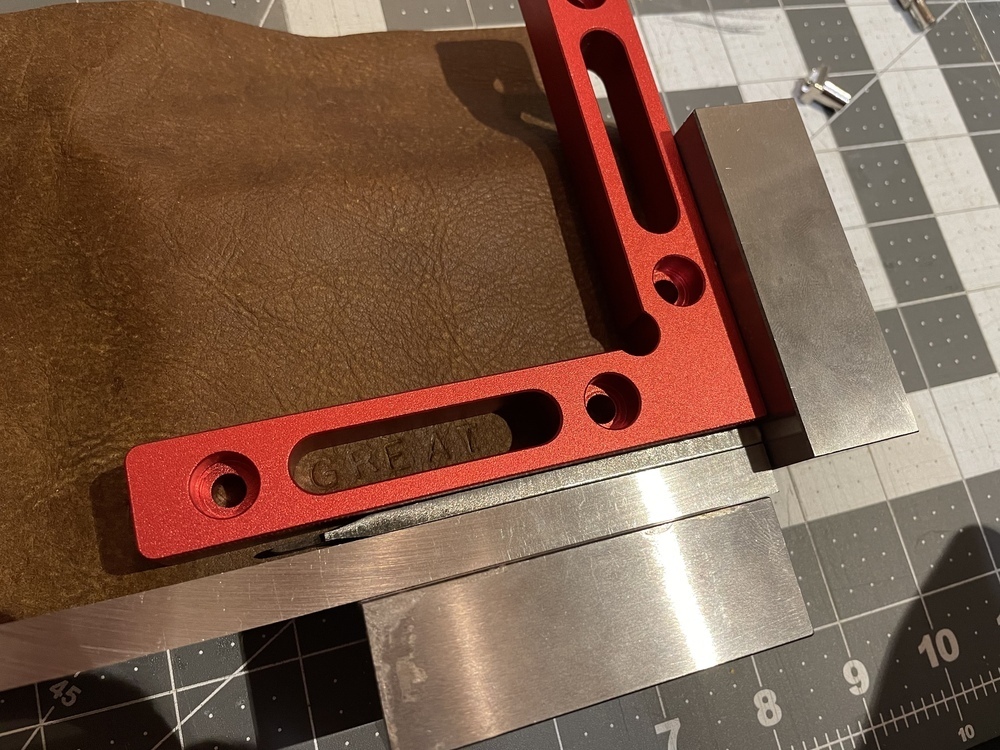
What do you use all this stuff for? Run the leather into the corner. Use the red 90 to consistently offset. Use the 10cm long bars as per-line spacers (and cheat again by using a two-prong pricker to nudge it up a little more). Basically, you get pretty good consistency and repeatability and have tons of options for squaring up your cuts or getting good measurements.
It took a few days to figure a good arrangement that would fit with the various scrap sizes and trying to protect the blocks as well as possible, but once it was started, it also took a few concentrated work sessions to finish.
- Layout
- Cut + Dry-Fit
- Stitch-the-denim
- Stitch-the-zipper
- Rivet, rivet, rivet…
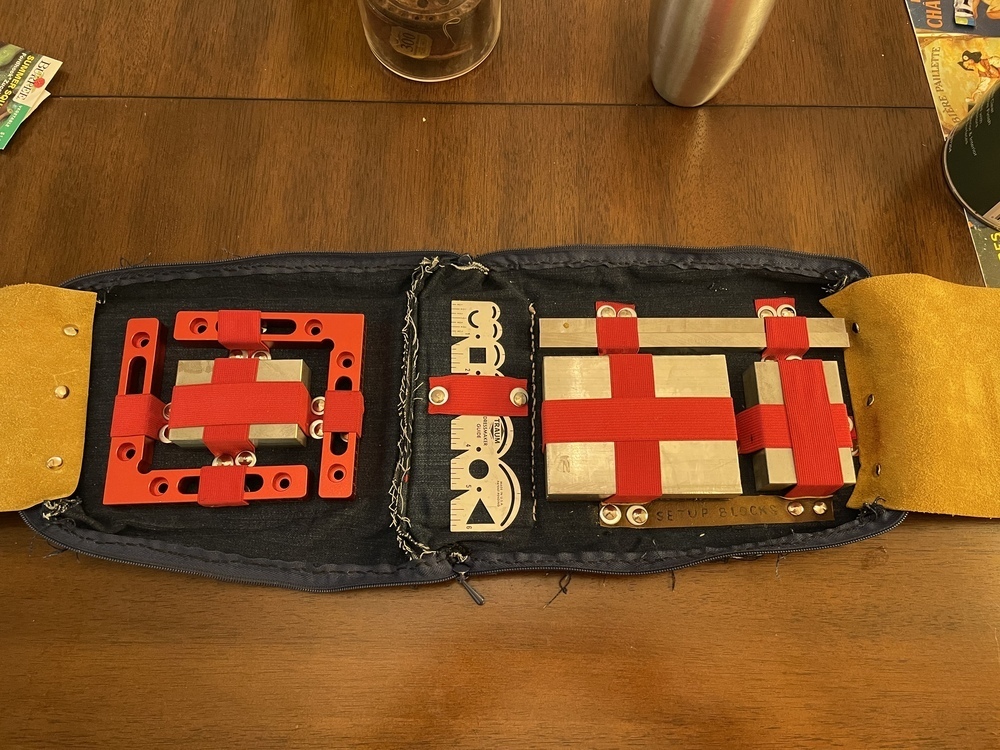
What does it look like inside? All the metal is heavy and “precision” so I didn’t want it rattling around against each other in a box with all my other tools. Therefore: make a zippered container for it, with all the blocks held down by elastic.
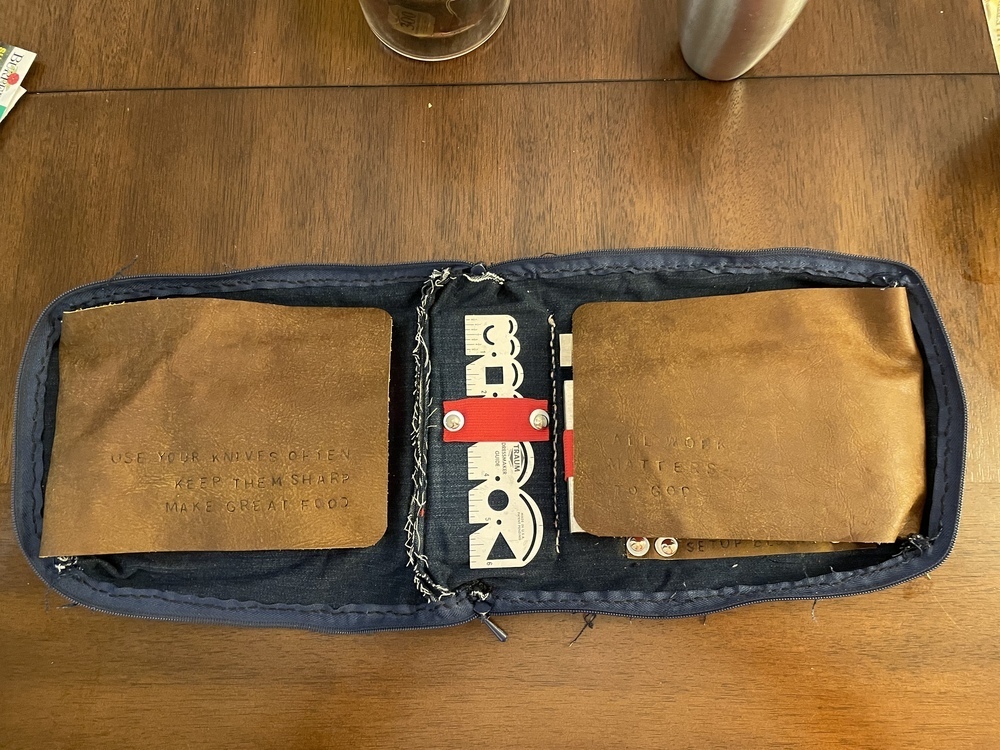
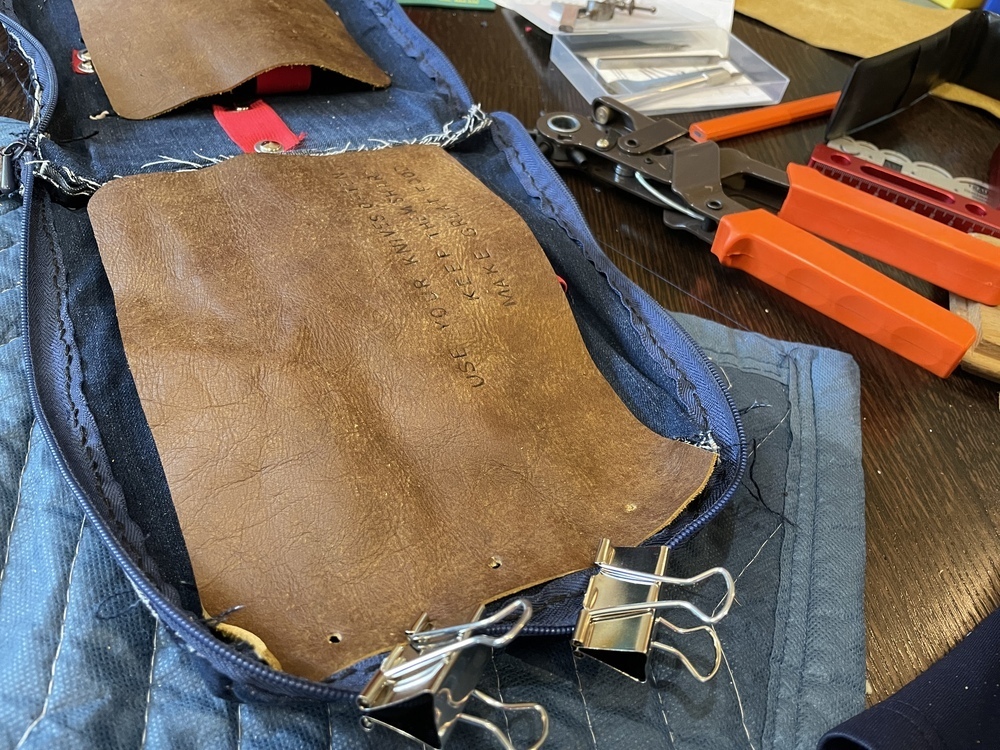
Since the metal is “precision”, I also didn’t want the faces rubbing against each other while the case was closed so I “faced” the blocks with some protective leather. …and since the kit I got for my birthday had a letter punch kit (thanks again Phil!), I figured I’d put two quotes in there.
- “Use your knives. Keep them sharp. Make great food.” - This came in a knife-block that I bought, and is a great reminder that the best tool is one that’s used.
- “All work matters to God.” - This case isn’t the best made, but it is made. A reminder to not be afraid of imperfection, and that sometimes ephemeral work is its own reward.
…so have you ever blunted the heck out of a hole-punch by using it backwards?
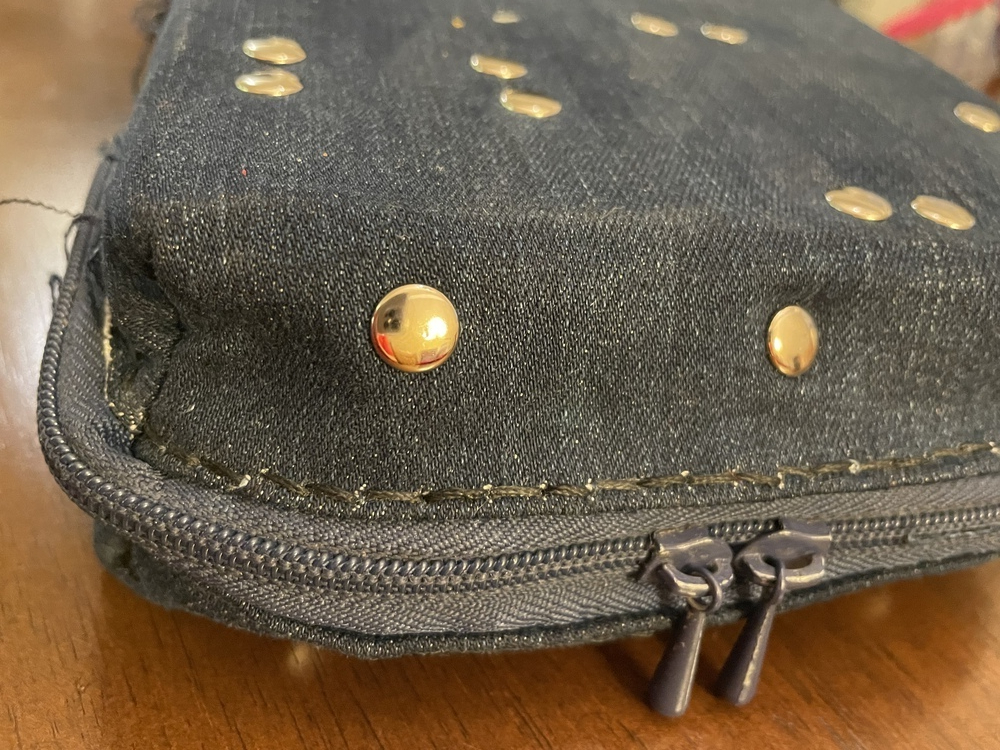
Stiching is all hand saddle-stitched (by eyeball on the zipper-denim seam)

…and some little leather details to keep the zipper from running off the edge.
All in all, I learned a lot, and have a new appreciation for what goes into a “simple” case like this.
22:30 CST | category / entries
permanent link | comments?